Automated Content Publishing for Free using Github Actions
It's been a week since I set up my personal blogging site and wrote my first article, and now I'm writing my second one! This is definitely a good sign and I'm feeling positive for the future of this blog-writing thing.
Anyways, let's now talk about the main topic of this article: setting up automated publishing of this blog site using Github Actions, why I need one and how I did it.
The Aim for Maximum Convenience #
For context, I'll start with describing the steps on how I published the updated blog site together with the first blog post. Here are they:
- Write the blog post.
- Build the whole blog site with the command
npm run build. - Login to AWS Console.
- Go to S3 and upload the built static pages to the S3 Bucket.
- Go to CloudFront and create a cache invalidation.
- Commit and push the changes to the git repository.
There are only 6 steps so it doesn't look like it's too much of a hassle. However, as a software engineer, I believe that to achieve the ultimate effectivity and efficiency, we must give all the work that can be done by machines to machines, and leave all the work that can only be done by humans to humans.
Thus, I decided to automate all steps that can be automated, namely the steps 2 to 5. Once it's properly set up, I can then spend all my time, energy and brain power to just writing the blog post.
Automating The Stuff #
The first step in the setup is to make a new IAM User that can perform the operations needed by the Github Action job to upload to S3 and create invalidations on CloudFront. So I logged into my AWS account, went to IAM and created a Policy with the following permissions:
{
  "Version": "2012-10-17",
  "Statement": [
    {
      "Effect": "Allow",
      "Action": [
        "s3:PutObject",
        "s3:GetObject",
        "s3:ListBucket",
        "s3:DeleteObject",
        "s3:GetBucketLocation",
        "cloudfront:CreateInvalidation"
      ],
      "Resource": [
        "arn:aws:s3:::<BUCKET_NAME>",
        "arn:aws:s3:::<BUCKET_NAME>/*",
        "arn:aws:cloudfront::<AWS_ACCOUNT_ID>:distribution/<DISTRIBUTION_ID>"
      ]
    }
  ]
}
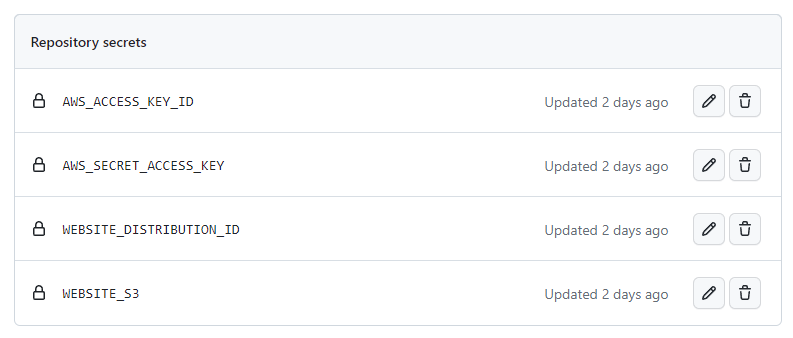
And then I made a new IAM User attached with the policy above. Creating that user gave me a set of AWS Access Key Id and Secret Key, which I saved as repository secrets in GitHub, including the CloudFront Distribution ID and S3 Bucket Name.

Finally, it's time to write the GitHub Actions pipeline. First, I defined the condition on when the pipeline should run, which is when I pushed to the main branch. I also defined non-sensitive environment variables that will be used by the steps later.
name: Build and Deploy
on:
  push:
    branches:
      - main
env:
  AWS_DEFAULT_REGION: 'ap-southeast-1'
  BUILD_DIR: ./_site
And then I added the usual steps for Github Action jobs: checking out the main branch, and installing NodeJS and the project dependencies, followed by building the static pages.
jobs:
  build-and-deploy:
    runs-on: ubuntu-latest
    steps:
      - name: Checkout
        uses: actions/checkout@v4
      - name: Setup node
        uses: actions/setup-node@v3
        with:
          node-version: 18
      - name: Install dependencies
        run: npm install
      - name: Build pages
        run: npm run build
Finally, I need the steps to upload to the S3 Bucket and invalidate cache for the CloudFront Distribution. Conveniently, the ubuntu-latest image also includes the AWS Command Line tool, which can be used to interact with AWS Services using scripts. AWS CLI will conveniently get the credentials in the environment variables automatically, so I just have to declare them in the env section.
- name: Upload to S3
  run: aws s3 sync $BUILD_DIR $WEBSITE_S3
  env:
    AWS_ACCESS_KEY_ID: ${{ secrets.AWS_ACCESS_KEY_ID }}
    AWS_SECRET_ACCESS_KEY: ${{ secrets.AWS_SECRET_ACCESS_KEY }}
    WEBSITE_S3: ${{ secrets.WEBSITE_S3 }}
- name: Create Invalidation
  run: aws cloudfront create-invalidation --distribution-id $WEBSITE_DISTRIBUTION_ID --paths '/*'
  env:
    AWS_ACCESS_KEY_ID: ${{ secrets.AWS_ACCESS_KEY_ID }}
    AWS_SECRET_ACCESS_KEY: ${{ secrets.AWS_SECRET_ACCESS_KEY }}
    WEBSITE_DISTRIBUTION_ID: ${{ secrets.WEBSITE_DISTRIBUTION_ID }}
The full yaml file can be viewed here.
Conclusion #
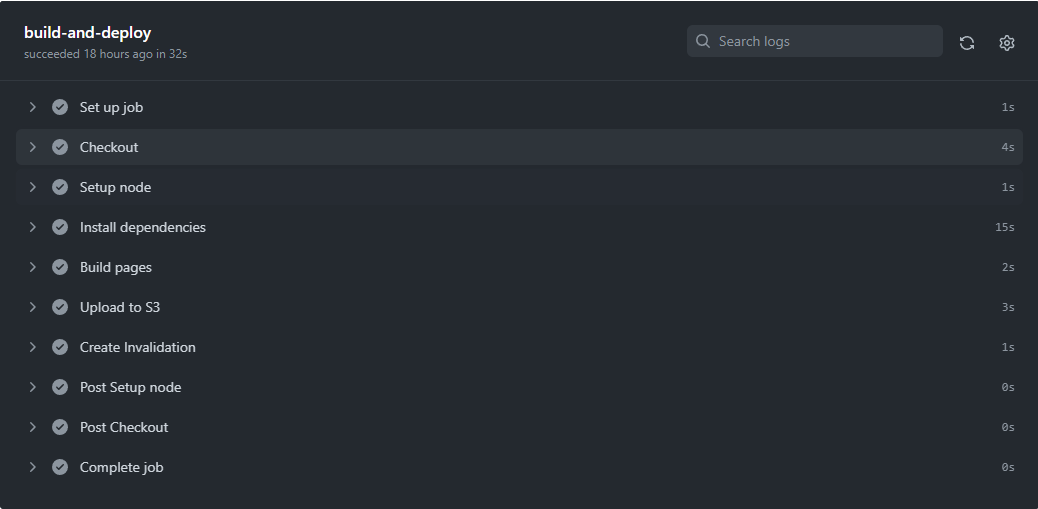
The whole pipeline runs in under a minute, which is significantly faster than what I can ever hope to achieve by doing it manually. Not bad for an investment of 2 hours-tops in coding it.

Together with some minor tweaks (e.g. making the images more responsive), I feel very satisfied on how these improvements turned out. This will definitely make me more productive in writing my next blog articles. It's fascinating how these simple tools can make everything easier at a very low cost (in this case, for free), if you just know how to use them well.
At this point, I'm not quite sure whether to start working on a new topic (aka project) already or just keep on adding enhancements to the blog site and write blog articles about them, since it's already highly usable with just a few more features that I think are cool, but are not really that necessary. But regardless of what choice I make, I hope to see you again on my next blog post!
- Previous: Hello World!